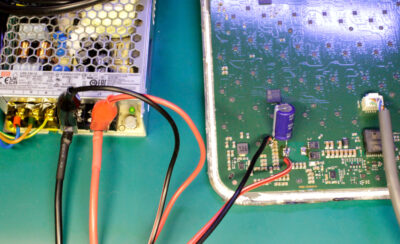
Today it has become popular to convert rectangular Starlink terminals into a flat “automotive” version.
There are tons of projects like this one or this. People cut the terminal case and pack it in a custom flat housing. Typical usage: RV.
An essential part of such modifications is the change of the power scheme.
In the automotive version, powering the terminal from 230/110 AC is inefficient. Power supply modification includes a custom PoE injector and DC/DC converter (12V – > 48V). I propose an even more efficient power supply scheme without additional voltage conversions.
Please note that most information below applies only to current rectangular rev3_protoX terminals.
Rev3 terminal PoE circuit
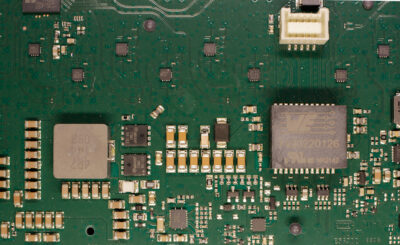
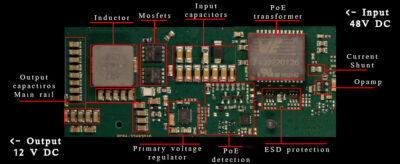
Let’s look at the PoE schematic on the board.
Here we can see Ethernet/Power connector, PoE transformer, current measurement circuit (0.05R shunt + AD8541 opamp), and primary DC/DC converter L3751. Plus, the PoE detection circuit and PD controller.
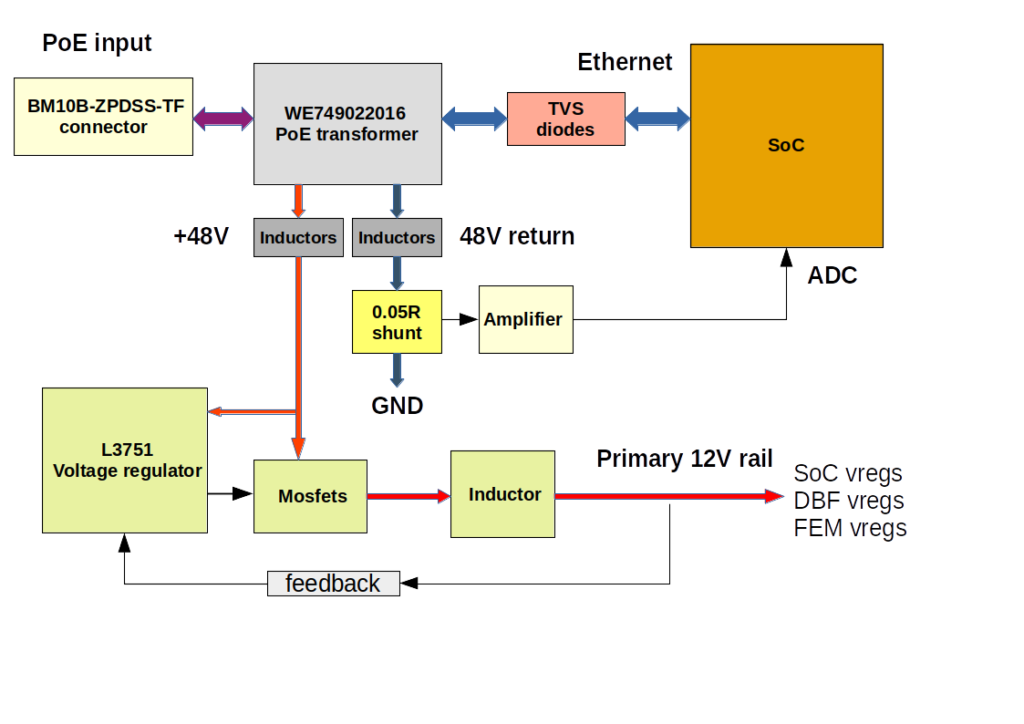
Here is the block diagram:
The primary internal power bus is 12V. All other Dishy’s voltage regulators feed from this bus. Thus we can bypass the input voltage regulator and provide 12V directly to the primary bus.
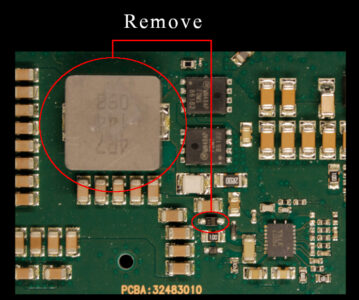
To protect the primary voltage regulator from reverse current, we need to disconnect it from the 12V bus. This can be done simply by removing the big inductor and feedback diode. You can see them in the picture below.
I do not recommend removing L3751 IC or MOSFETs. It’s more complicated, and there is a risk of messing up.
You may have noticed that we are also bypassing the current measurement circuit. This is okay. The Dishy firmware doesn’t care about zero consumption in runtime.
12V connection
After the components removing it’s safe to connect external PSU wires directly to the board. The most optimal connection point is the output ceramic capacitors array.
I highly recommend connecting an electrolytic capacitor in parallel.
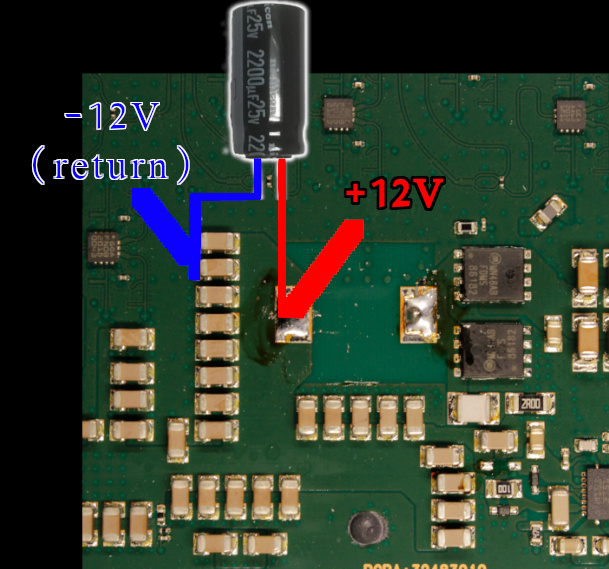 (-12 it’s just a zero point or ground. Not some negative rail)
The minimal capacitance is 470 µF when you have relatively short wires from the 12V source. If your wires are a few meters long, you can use a 2200 µF capacitor. I tested with 5 meters 12AWG cables. The capacitor voltage rating should be 25V.
Ethernet cable connected directly to a host/custom router with 8P8C/RJ45.
Don’t connect the reworked Dishy to any PoE power supply or Gen2 Starlink router.
Measurements
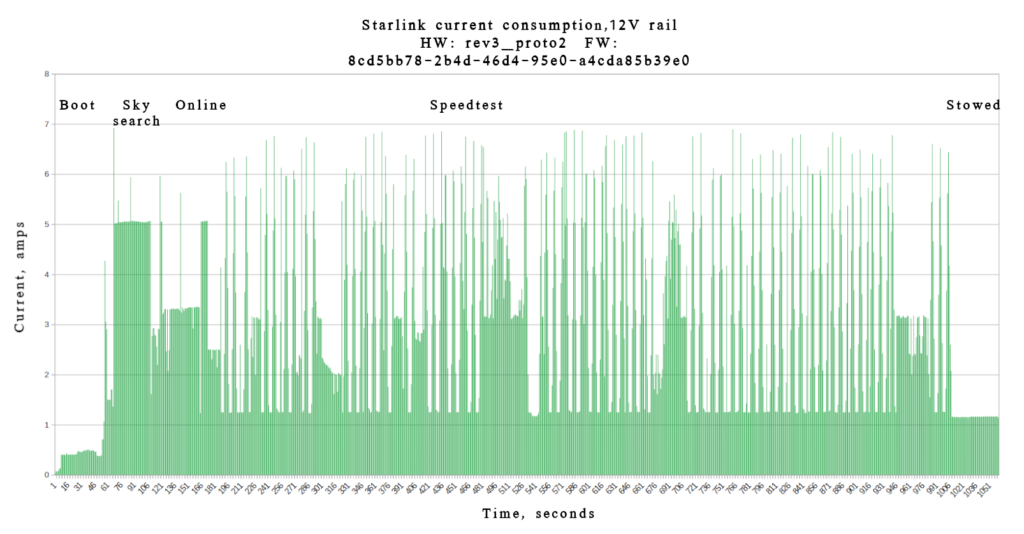
I connected my shelf multimeter to the 12V rail and used the ut-reader to collect and plot current measurements.
As you can see, Dishy jumps to 7A, and the median consumption is around 5-6A, depending on the operation. The values can change very quickly, so your power supply must be able to handle sudden surges in consumption. When stowed, Dishy consumes a constant 1.1A.
The minimum supply voltage is 10V, and the absolute maximum is 15V. Please, do not exceed 15V value. It might damage your Dishy.
Please note that powering the Dishy from the car’s 12V line might be dangerous when ICE is running. The voltage levels might be pretty unstable.
Also, Tesla’s low voltage line is 16V instead of 12V (Li-ion low voltage battery). Consider this if you plan to power your Dishy from the modern Tesla car.
Thanks for reading.
